| Nightmare 1999 |
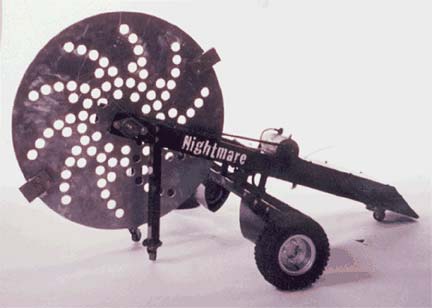
| Nightmare is a pretty simple design, really. If you look at the photos, you will notice the big disc in front. This is the primary weapon, with large stainless steel teeth bolted securely at opposite sides. The disc is NOT a saw blade. People often mistake it for one, it is a 'rotary bludgeoning device' where the two teeth act as sledgehammers. This disc, when spinning at the top speed of 300mph can be extremely destructive to any robot in its path. The little feet with casters you see in the front don't actually ride on the ground, but when the disc makes contact with its target, these feet keep the disc from hitting the ground and improve overall stability by leveraging the other robot into the air. |
 |
||||
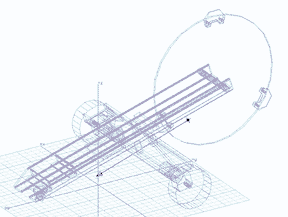
| Here is an early 3D concept design of Nightmare done on my computer. I do most of my design in Form•Z 3D (Mac) before I do any real cutting. Form•Z is not normally used for this stuff (I use it at work to build 3D models for movies), but it's what I'm most familiar with, so its what I stick with. |
 |
||||
| This is an early prototype for Nightmare's drive system. I built this so I could see the speed of the motors and get an idea on the driveability and power. I highly recommend new builders do something like this to test out the different motors they want. Just a simple 3/4
inch MDF sheet with the Dayton gearmotors bolted on with the Vantec
speed controller, the receiver, and a battery. No casters or anything.
This performed extremely well! These motors are great! |
 |
||||
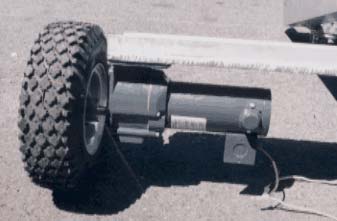
| Nightmare's
drive motors, while they may not be very fast, they can easily pull a car,
and can push around most robots in the arena. Here is the gearmotor for the drive wheel mounted in its final location on the robot. The 11.5 inch diameter tires have a custom-made hub attachment to the shaft of the motor with a taper bushing. Now I just have to add some rear supports and route the wires up and through the frame. I am still overwhelmed at the power of these motors- which, by the way were donated by my sponsors- Grainger! Thanks guys! |
 |
||||
| Nightmare is simplicity at its finest. There is a huge 6061 aluminum frame holding him together with strong welds, because of the shape of this frame, he needs only minimum armor protection over the electronics, which is taken care of by a small sheet of titanium. The rest of the robot is exposed to eliminate weight. | 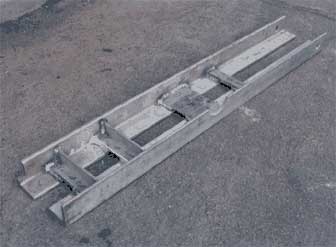 |
||||
| Another view of his frame. I had the welds done at a local welding shop, making sure that there was NO weak points that would allow breakage or flexing. I admit I used some serious overkill on the strengh of this frame, but I wanted to take no chances. | 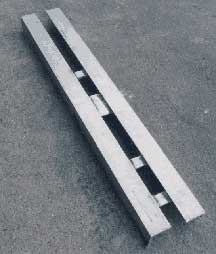 |
||||
| Here is the crossbeam for the wheels welded into its final place. I used some 1" square aluminum rods and some 1x1/2 aluminum rods with triple welding to hold it all together. | 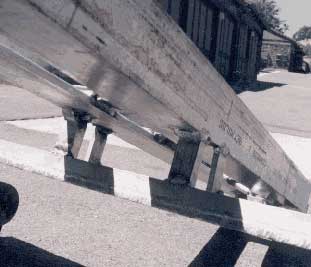 |
||||
| Of course, with all that thick frame, there is a lot of weight. I had to start drilling some holes to reduce the weight. I drilled these holes out from the rear of the robot to save weight. | 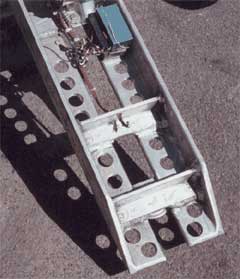 |
||||
| One of the casters Nightmare uses for support in the back where his frame rolls. These things are great! Very low profile, extremely durable dual-polypropylene wheels with independant bearings, and a complete rotary base with its own bearings make this an excellent choice for heavy robots. These too were donated by my sponsor Grainger! | 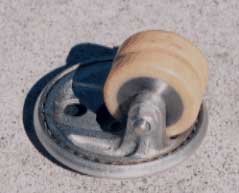 |
||||
| Here is the solenoid I used to switch on and off Nightmare's spinning weapon. That's 4 gauge wire leading from the solenoid to the switch and back to the back fuse block! | 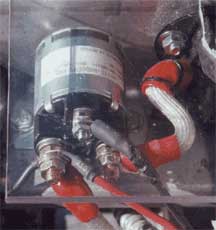 |
||||
| The size of Nightmare is functional to his purpose as well. The support for the disc has to be large and long to eliminate the possibility of flipping over backwards in an impact, while the wheels are spaced extremely far apart to reduce the risk of being flipped or lifted onto his side, not to mention a wider space like this reduces the incredible effects of the massive gyroscopic forces created by the spinning weapon. Lifting-robots should not be able to do much to Nightmare, as any part of the robot is lifted, at least one drive wheel remains on the ground to free himself. | 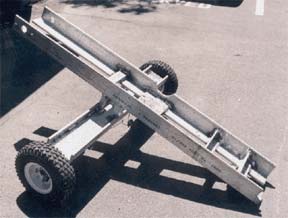 |
||||
| I added only a few extra armor plates, here I just finished the motor guards. | 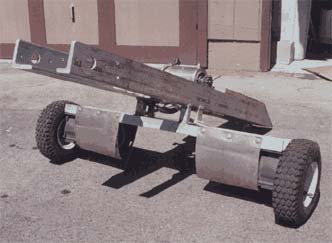 |
||||
| I wanted to make sure there was little risk of chain breakage or slippage, so I opted for a massive double #40 roller chain (breaking point of 16,000 lbs!) | 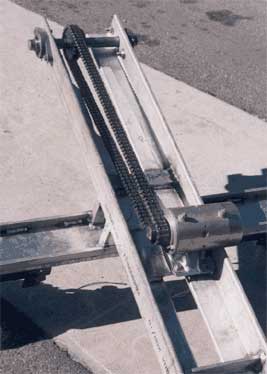 |
||||
| Testing out the fit of the disc before drilling the holes - so far so good! | 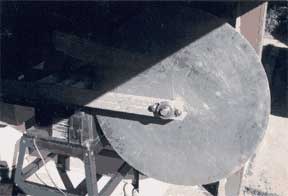 |
||||
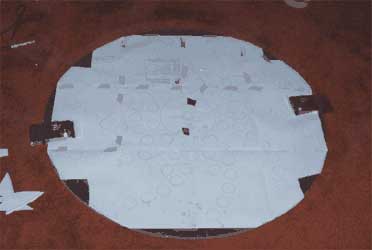
| I decided to cut some holes in the disc to lighten it up and provide a cool pattern, while making it heavier on the outside than on the inner portion. This makes is spin faster and adds additional force to the teeth at the very edges. Here, I've laid out a pattern by tiling a computer printout and taping it to the disc. From there, I simply took the power drill and hole saw (yes, handheld, it was too big to fit on my drill press!) and drilled where the paper marked it. Hey, low tech, but it worked just fine! |
 |
||||
| I just couldn't enter a drab silver metal robot, so a couple cans of spray paint later, and Nightmare was about ready to strut his stuff! | 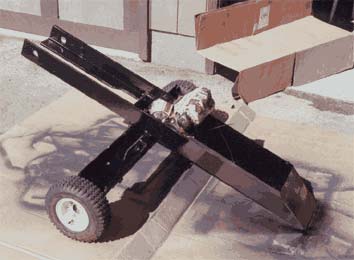 |
||||
| Looking from the rear. That is a titanium sheet on the back for armor to protect all the electronics. | 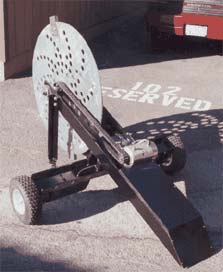 |
||||
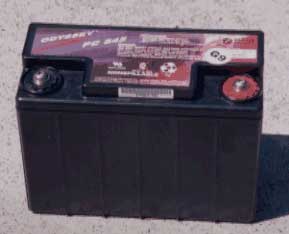
| The PC545 Hawker Odyssey Drycell battery I am using to power Nightmare's weapon and a second one for his drive motors. Yes, the first version of Nightmare was only running on 12 volts, both for weapon and for drive. |
 |
||||
![]()

![]()